Showing posts with label Javascript. Show all posts

Tuesday, January 26, 2021

TC Cup of Codes: Smooth Scroll to The Top

On today's post, I would like to add another enhancement to my blog. As I've been reading my posts on my phone, one thing came to my realization, it's tiring to scroll back up finding home. So I decided to look around on what I could do, which finally led to this snippet for a Scroll Up.

For this tutorial, I would like to use a circular button (you can use any button you want) with an up arrow sign. I believe, in the UX part, it won't be treated as having an ambiguous function (Up Arrow means go to the Top). 


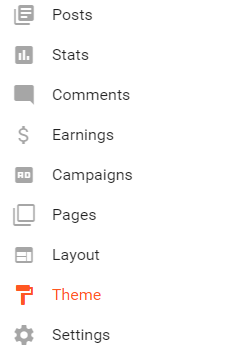
1. Go To Your Layout


There are two ways to do this, the first option is you can go to your Theme section and edit your template. The second option is go to your Layout and add HTML/Javascript widget. For this tutorial, I'm gonna use the second way.

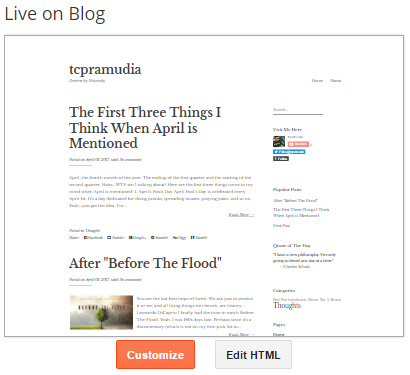
Choose Add A Gadget:


Pick HTML/Javascript:

2. Add The Codes Below

ouou


01
02
03
04
05
06
07
08
09
10
11
12
13
14
15
16
17
18
19
20
21
22
23
24
25
26
27
28
29
30
31
32
<!--Smooth Back to Top Button Start-->
<script>
jQuery(document).ready(function() {
var offset = 220;
var duration = 500;
jQuery(window).scroll(function() {
if (jQuery(this).scrollTop() > offset) {
jQuery('.back-to-top').fadeIn(duration);} else {
jQuery('.back-to-top').fadeOut(duration);}});
jQuery('.back-to-top').click(function(event) {
event.preventDefault();
jQuery('html, body').animate({scrollTop: 0}, duration);
return false;})});</script>
<style>
div#page {
max-width: 900px;
margin-left: auto;
margin-right: auto;
padding: 20px;}
.back-to-top {
position: fixed;
bottom: 0%;
left: 50%;
text-decoration: none;
color: #000000;
font-size: 12px;
padding: 1em;
display: none;}
.back-to-top:hover {
text-decoration: none;}</style>
<!--Smooth Back to Top Button End-->


<!--Smooth Back to Top Button Start-->
<script>
jQuery(document).ready(function() {
var offset = 220;
var duration = 500;
jQuery(window).scroll(function() {
if (jQuery(this).scrollTop() > offset) {
jQuery('.back-to-top').fadeIn(duration);} else {
jQuery('.back-to-top').fadeOut(duration);}});
jQuery('.back-to-top').click(function(event) {
event.preventDefault();
jQuery('html, body').animate({scrollTop: 0}, duration);
return false;})});</script>
<style>
div#page {
max-width: 900px;
margin-left: auto;
margin-right: auto;
padding: 20px;}
.back-to-top {
position: fixed;
bottom: 0%;
left: 50%;
text-decoration: none;
color: #000000;
font-size: 12px;
padding: 1em;
display: none;}
.back-to-top:hover {
text-decoration: none;}</style>
<a href="#" class="back-to-top"><img src="https://blogger.googleusercontent.com/img/b/R29vZ2xl/AVvXsEis0o6j0ShMri8ADgshCFbc6yKh9zI6p0s6h4mlRho1nyxoGUMGwQAFMhQyWjgOKllc5-W5U3viGUONvadVm2V63czLARhYRBYycwfRkpGwuX61hg4jnPoBbQOY9F4fNUuQY0_h_xVut8k/" alt="Back to Top" / /></a>
<!--Smooth Back to Top Button End-->
Let's analyze the codes part by part.

1. The <script> part

The document ready() method will specify a function to execute when the DOM is fully loaded.
 
1
jQuery(document).ready(function()
 
 
jQuery(document).ready(function()
The offset will allow you to determine when the button will show up, the duration will determine how long the animation will work (in will be used for the fade in and fade out effect)
 
1
2
var offset = 220;
var duration = 500;
 
 
var offset = 220;
var duration = 500;
And the last part, here comes the magic. scrollTop() method will set or return the vertical scrollbar position for the elements. It will also use offset to determine whether the page has moved or not.

 
1
2
3
4
5
6
7
8
jQuery(window).scroll(function() {
if (jQuery(this).scrollTop() > offset) {
jQuery('.back-to-top').fadeIn(duration);} else {
jQuery('.back-to-top').fadeOut(duration);}});
jQuery('.back-to-top').click(function(event) {
event.preventDefault();
jQuery('html, body').animate({scrollTop: 0}, duration);
return false;})});
So, there you have it. A button to scroll your page up to the top after reading the article you've written. See you on another post!

Friday, June 12, 2020

TC Cup of Codes: Make a Custom Profile Widget

Since, I migrated my blog to a new account, my Profile Widget has changed into a list of contributors which has made the look became unappealing to see.


Thus, in this post, I would like to share how to make a Custom Profile Widget which would show a picture (if you want), your name, a bit of description, and also a link to your profile page from it. Mine looks like below:


Without further ado, here are the steps to reproduce your profile widget:

Step 1: Go To Your Layout

Log to your Blogger account, and click on Layout.


Step 2: Click Add a Gadget

On the right panel, you'll find a structure of your blog and a list of your installed widgets. Click on Add a Gadget.


Step 3: Choose HTML/Java Script

After clicked Add a Gadget, a Pop-up will then show on your browser contains all kinds of widget features that you can add to your blog. In order to put the codes for your profile widget, click on HTML/Javascript.


Step 4: Fill The Title You Want, and Add The Code Below

There will be two columns shown, first is Title. You can fill it with anything you want.


Step 5: Add The Code Below

The second one is Content. Copy Paste all the codes below:


1
2
3
4
5
6
7
8
9
<dl class="profile-datablock">
<dt class="profile-data">
<a class="profile-name-link g-profile" href="https://www.blogger.com/profile/17710845953662035683" rel="author" style="background-image: url(//www.blogger.com/img/logo-16.png);">
Your Name
</a>
</dt>
<dd class="profile-textblock">Your Information</dd> </dl><br/>
<a class="profile-link" href="https://www.blogger.com/profile/17710845953662035683" rel="author">View my complete profile</a>


<a href="https://www.blogger.com/profile/17710845953662035683"><img alt="My Photo" class="profile-img" height="70" src="https://blogger.googleusercontent.com/img/b/R29vZ2xl/AVvXsEgVcAEWsp71eDpspnF3pL8TByPXQwi5ROEHF4KWwxyTp_fYbiA-wrVuXasqXAKgNE97a6GSgJ7KrH4Xkz4rBn2Uza7VSz9I0LUj0ZyVNypdUH70DVHtRUKyH1gnJT7KWNJjlavHTeY7q2pD/s113/favicont.gif" width="80" /></a>
<dl class="profile-datablock">
<dt class="profile-data">
<a class="profile-name-link g-profile" href="https://www.blogger.com/profile/17710845953662035683" rel="author" style="background-image: url(//www.blogger.com/img/logo-16.png);">
Your Name
</a>
</dt>
<dd class="profile-textblock">Your Information</dd> </dl><br/>
<a class="profile-link" href="https://www.blogger.com/profile/17710845953662035683" rel="author">View my complete profile</a>


  • On line 1, 4, and 9, you should change the Blogger ID (mine shown as 17710845953662035683) to your ID. If you want to use other profile such as Facebook, you should change the whole text inside the quotes sign (" ").
  • On line 1, change the picture inside tag "img" to any picture you want to represent you.
  • On line 5, fill your name.
  • On line 9, fill your description.
So there you go, you have a new personalised profile widget on your Blogger.

Source: 

Thursday, April 20, 2017

TC Cup of Codes: Separate Numbers from a String in Javascript

So this morning, a friend asked how to separate numbers from a string using Javascript. He wants to use car plates as input, for example: "AB1234DCD" and wants the output to be "AB 1234 DCD".

After spent some time coding Googling with various possible algorithms keywords, I finally got the answer from.....http://stackoverflow.com. :D

Using split.(/(\d+)/) it will automatically split the string "AB1234DCD" into an array "AB", "1234", "DCD". And after that, you can do anything you want to the array. In the code below, I use join(" ") to append the array and add white space between each element.


1
2
3
4
5
6
7
8
9
function SplitPlate() {
   var plateOld = document.getElementById('oldPlate').value;
   arr = plateOld.split(/(\d+)/)
   plateFinal = arr.join(" ");
   //alert(test);
 
   var plateNew = document.getElementById('newPlate');
   plateNew.innerHTML = plateFinal;
 }


function SplitPlate() {
   var plateOld = document.getElementById('oldPlate').value;
   arr = plateOld.split(/(\d+)/)
   plateFinal = arr.join(" ");
   //alert(test);

   var plateNew = document.getElementById('newPlate');
   plateNew.innerHTML = plateFinal;
 }

Saturday, April 8, 2017

TC Cup of Codes: Display Line of Codes on A Blog Post

I want to learn programming again.

I've been away for too long from this "world" and I miss it so much. The creative process. The late-nights. The "A-ha" moments. Even the stressed-out by.

So, one of the main purpose of this blog is to document all the lessons I've learnt. And it will look good if I can show the lines of codes properly on a post.

I've looked it up, and here's how to display your codes better on a blog post. P.S.: I'm using blogger account for this tutorial.

********

1. Log in to your blogger account.

2. Click on Theme from the side menu

3. Click Edit HTML

4. Insert the following codes in the <head> section of your HTML:


01
02
03
04
05
06
07
08
09
10
11
12
13
14
<pre class="brush: html" name="code"><script src="http://alexgorbatchev.com/pub/sh/2.1.364/scripts/shCore.js" type="text/javascript"></script>
<script src="http://alexgorbatchev.com/pub/sh/2.1.364/scripts/shBrushJScript.js" type="text/javascript"></script>
<script src="http://alexgorbatchev.com/pub/sh/2.1.364/scripts/shBrushXml.js" type="text/javascript"></script>
<script src="http://alexgorbatchev.com/pub/sh/2.1.364/scripts/shBrushCss.js" type="text/javascript"></script>
<script src="http://alexgorbatchev.com/pub/sh/2.1.364/scripts/shLegacy.js" type="text/javascript"></script>
<link href="http://alexgorbatchev.com/pub/sh/2.1.364/styles/shCore.css" rel="stylesheet" type="text/css"></link>
<link href="http://alexgorbatchev.com/pub/sh/2.1.364/styles/shThemeDefault.css" rel="stylesheet" type="text/css"></link>    
<script language="javascript">
window.onload = function () {
    dp.SyntaxHighlighter.ClipboardSwf = 'http://alexgorbatchev.com/pub/sh/2.1.364/scripts/clipboard.swf';
    dp.SyntaxHighlighter.HighlightAll('code');
    dp.SyntaxHighlighter.BloggerMode();
}
</script></pre>


<pre class="brush: html" name="code"><script src="http://alexgorbatchev.com/pub/sh/2.1.364/scripts/shCore.js" type="text/javascript"></script>
<script src="http://alexgorbatchev.com/pub/sh/2.1.364/scripts/shBrushJScript.js" type="text/javascript"></script> 
<script src="http://alexgorbatchev.com/pub/sh/2.1.364/scripts/shBrushXml.js" type="text/javascript"></script>
<script src="http://alexgorbatchev.com/pub/sh/2.1.364/scripts/shBrushCss.js" type="text/javascript"></script>
<script src="http://alexgorbatchev.com/pub/sh/2.1.364/scripts/shLegacy.js" type="text/javascript"></script>
<link href="http://alexgorbatchev.com/pub/sh/2.1.364/styles/shCore.css" rel="stylesheet" type="text/css"></link>
<link href="http://alexgorbatchev.com/pub/sh/2.1.364/styles/shThemeDefault.css" rel="stylesheet" type="text/css"></link>     
<script language="javascript">
window.onload = function () {
    dp.SyntaxHighlighter.ClipboardSwf = 'http://alexgorbatchev.com/pub/sh/2.1.364/scripts/clipboard.swf';
    dp.SyntaxHighlighter.HighlightAll('code');
    dp.SyntaxHighlighter.BloggerMode();
}
</script></pre>
If you need to display certain other languages, you can use other brushes to display the codes better. Here are some of the list:

http://alexgorbatchev.com/SyntaxHighlighter/manual/brushes/


5. Save your changes

6. Use the following into the <body> whenever you want to put your code:

  
1
2
3
4
5
<div style="text-align: justify;">
<pre class="brush: html" name="code"><pre class="brush: javascript" name="code"># Your Javascript Code</pre>
</pre>
</div>
<div style="text-align: justify;">


<div style="text-align: justify;">
<pre class="brush: html" name="code"><pre class="brush: javascript" name="code"># Your Javascript Code</pre>
</pre>
</div>
<div style="text-align: justify;">

************

Thats it!

Now you can display some codes on your blog post.

Sources: